
Hello WordPress fans! In this post I will be explaining how to migrate your data from WordPress.com to a self-hosted WordPress solution, and how to transfer your subscribers, stats and install the best SEO and Caching plugins so your new blog will be blazing fast and super-optimized for the search engines. If you have been hosting a blog at WordPress.com for a while, you may feel that it’s time to upgrade. Unfortunately the personal and premium WordPress package do not offer much flexibility. If you want the ability to install plugins, WordPress requires that you subscribe to their business package at $25/mo, which is quiet steep for most of us especially if you take into consideration that many WordPress users have less than 100 visitors a day. Note that WordPress wrote a guide for people who are moving to Self-Hosted WordPress, but you may still have questions which is why I wrote this guide on how to sucessfully move your blog.

Step 1: Select a Hosting Package
Selecting the appropriate web hosting company and hosting package for your WordPress blog is of extreme importance. It is of no use to pay a lot of money for a hosting package that gives access to resources you will never use, but on the other hand you want to ensure that you will be located on a fast and responsive server so your visitors will have a pleasant user experience.
There are a variety of web hosting providers that are being recommended by WordPress. I have tried several of them with mixed feelings, mainly because of poor customer support. While the servers are overall responsive and well maintained, the service department is generally not as responsive as I like them to be. This means that if you have no technical knowledge you may have difficulties finishing the installation without running into trouble.
Free Automated Migrations
Free automated WordPress migrations are great! However, there is a pitfall. In order to apply for such automatic transfers you must be able to install plugins, and you guessed it already, this is only possible with the $25/mo WordPress business package. In other words, unless you are already on an expensive package you will need to do a manual migration which may be confusing if you have little technical knowledge, which is exactly why I have written this post.
So which hosting provider to choose?
Let’s assume you have a WordPress blog that receives less than 250 visitors a day, and you simply want your visitors to read your posts (you’re not hosting any resource intensive scripts). In this scenario a web hosting package under $3/month will easily meet your needs.
Hostgator
At the time of this writing HostGator is having a special on WordPress Hosting for only $2.75/month which is called the Hatchling Plan and which comes with a free domain name. HostGator is owned by the Endurance group which also owns Bluehost (recommended by WordPress). What I didn’t like about Hostgator is that once your account is due for renewal, you will be charged at their “normal” rate of $10.95/mo, something which is not clearly stated on their website and for which they referred me to the prices listed in the control panel.

Dreamhost
Dreamhost on the other hand offers low-cost hosting starting at only $2.59/mo, and there are no gimmicks once it’s time for the renewal. Regardless, also here it’s wise to read the fine-print, because you do not get the ability to configure sub-domains (for example subdomain.myblog.com), and the web hosting package requires you to upgrade if you want email service for your domain. But putting all things into perspective, they provide reliable hosting for your WordPress blog for less than $2.60/month, and customer support is friendly and responsive. And did I mention Dreamhost is offering a free domain name too?

And if you plan on choosing a different web hosting service provider to host your WordPress blog than always make sure that they offer free SSL certificates as the need to purchase one independently will greatly increase the total cost.
Installing the WordPress Software
Once you have settled for a web hosting service provider it is time to install your WordPress blog on the new location. Make sure to ask for a temporary URL so you can access your new blog until you are sure that everything is the way you like it. You should never change the DNS before everything is ready, and if you plan on moving your domain name, your want to make sure to wait with this until after your DNS has been pointed to the new location (moving a domain name takes 5-8 business days during which you will not be able to change any domain data). Installing WordPress can usually be done with the press of a single button in the cPanel control panel, or alternatively your webhost will ask during registration if you want the WordPress installation by default. In case none of the options above are offered, you can always install WordPress by downloading a copy from WordPress.org. Both DreamHost and HostGator come with WordPress pre-installed.
Migrating your data
In order to move your data you will need to have WordPress installed. This should not be a problem even if you chose a web hosting company different from the ones I mentioned above. You should first EXPORT your data. In order to do this visit your old WordPress blog, go to TOOLS and click on EXPORT CONTENT. In theory this is all you will need but I still always make a copy of the media library just in case. Just an old habit.

Save the content in a place where you can remember it. Remember, only the first file will be required, the media library can downloaded automatically from the remote location.
Next what you want to do is go to the newly installed WordPress blog and import the database file (the one with the .XML extension), you may have to unzip it first.

You will be asked to choose from a list what kind of content you are importing, and you should choose the last option which says WordPress –> Run Importer. Now upload the database file and start the process. Make sure to check the option to download all media files when prompted.
An error which most people run into at this time, is that they are unable to download all the media files because of server limits that allow you to use only a certain amount of resources. These limits are set by your web hosting provider and can usually not be changed. There used to be a way around this by uploading the media files via FTP, and then using a plugin to make them visible in the WordPress media library. The WP plugin I’m referring to is called “Add to Server”, but it stopped working about 3 months ago and people have been experiencing difficulties. (I will tell you how to solve this problem keep on reading).
When trying to replace the “Add to Server” plugin with another one you will find that you run into a lot of paid plugins that require you to install the WP plugin on both ends of your WordPress blog, and because you don’t want to pay $25/mo for the monthly WordPress subscription this is not an option.
So how to fix the WordPress media import issue?
The solution is simple. When you import the data from the database you will most likely get the same server 500 error everyone else runs into, and in order to solve this issue you can simply repeat the process of importing the same database file. While this apparently makes no difference (you will have to do this quiet a few times and the server will keep crashing each time) you can open the WordPress Media Library in another tab and here you will see that with each attempt you will be adding a few extra rows of media until all the content has been downloaded, after which you receive a confirmation that everything has been correctly imported. It may take you a while but eventually all the content will be there. Piece of cake, a kid can do the laundry!

If importing the same database file over and over has caused some duplicate content you can easily delete this, or just leave it the way it is, since there is usually no storage limit on a self-hosted WordPress account it’s nothing to worry about.
Installing a Cool WordPress Theme
So now you’ve got the content of your blog migrated to the new location, whats next? First of all let’s make sure you install a super cool template for your blog. When no longer hosting at WordPress.com the template you used before may or may not be available, but even if it’s not, you now have the freedom to install thousands of different templates while you were previously limited to just a few.
On the WordPress.org site alone you can find over 7500 themes, and then you can also find themes on non-WordPress sites, so its fair to say that finding a theme that you absolutely love is a fun process that should appeal to everyone.
After you have installed the Theme it’s time to make some modifications. If you are a picky person you can change the font size (I like size 18) and letter type, install widgets and play with all the customization options the new template has to offer, or you can simply keep the default configuration which is just fine for the majority of bloggers.
Installing Plugins
If you liked being a part of the WordPress community than the Jetpack plugin is a must-have. It allows you to move your stats, subscribers and you can even login to your new self-hosted blog with your WordPress.com account so it also adds security. But you want to run the plugin in safe-mode until the DNS has been updated and your domain name transferred.
If you want your site to be blazing fast and responsive I recommend the WP Super Cache plugin, it has been around for as long as I can remember and it’s still the best of its kind.

The WP Super Cache plugin requires some basic knowledge on the users end in order to get the configuration right, but once you’ve got everything configured this plugin makes your blog super-fast!
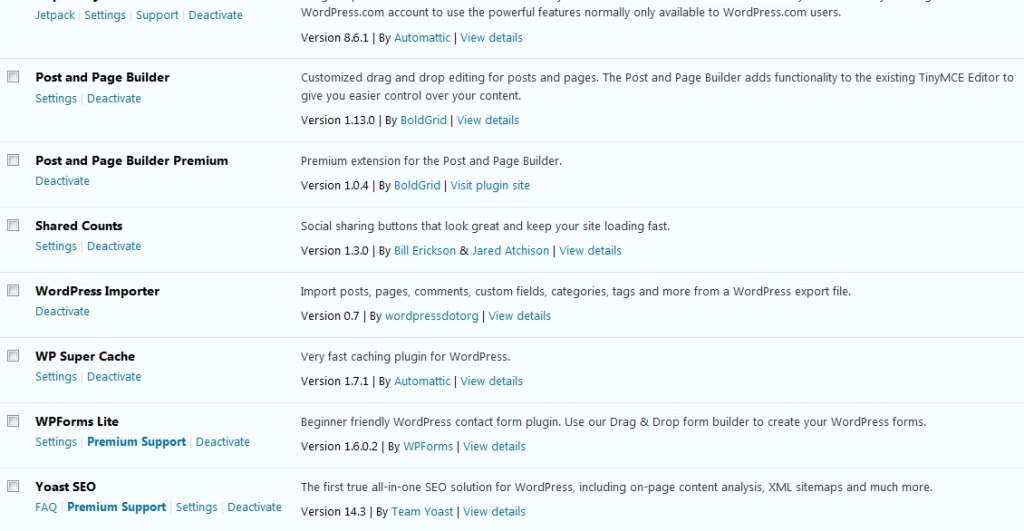
So as you can see above I have the ability to install any plugin I like, and additionally I can choose from over 3.500 free WordPress themes that can be found on WordPress.org, or I can choose to install from any other location, and all this with a DreamHost hosting package of only $2.59/month.
SEO Plugins
Playing with SEO plugins is a lot of fun, but if you have an established website and you are inexperienced you could really hurt your rankings by choosing the wrong configurations. My advice is that if you don’t know what you are doing and you value your blog traffic, it’s better to look for assistance.

The plugin above is called the Internal Link Juicer. It’s excellent for blog owners who have a large amount of posts but never hot-linked any of their pages. Since it would take a long time to manually cross-link all the internal posts and pages, you can configure the plugin to set preferred keywords for each post, and use the content of each posts to automatically locate link text and point links to desired locations. A great time-saver but you must never stop using it or change the settings as this will guarantee a drop in search engine ranking.
Point DNS to the New Location
We’re almost done. Your new web host will have provided you with an IP address and name server URL. Now all the content has been migrated and you have installed your new template and the plugins it’s time to point the DNS to the new location. Login to WordPress.com and go to the menu on the left hand side and click on MANAGE –> DOMAINS –> CHANGE DNS. You will notice that once you change the DNS your website will be down for a couple of hours. When it comes back up your URL will be connected to the new host meaning that your blog is finally live.
Transferring your Domain Name
Once you have changed DNS you may see security warnings. This is especially true for people who find your site through the search engines as search engine result pages will take a while before they update your URLs from HTTPS to HTTP. The reason people get an error when landing on the HTTPS URL is that WordPress uses SSL certificates by default, and HTTPS is not enabled by default on a new host (Dreamhost and HostGator do offer free security certs but your domain name needs to be transferred first in order to be able to use a certificate with your domain). Transferring the domain is as easy as taking off the “lock” under the domain section in the WordPress.com menu, and requesting a transfer in the cPanel control panel at your new hosting company. A domain transfer usually takes 5-8 business days and during this time you cannot change any data so in order to prevent downtime make sure to point your DNS to the new host before you request for the domain to be transferred. Once the domain name has been successfully moved you can install the SSL cert and the errors will no longer appear.
Transferring Subscribers and Stats – Taking the Jetpack Plugin off Standby
And we’re down to the last step, taking the WordPress Jetpack plugin off standby which allows you to synchronize with WordPress.com and retrieve all your subscribers and stats. The Jetpack plugin additionally offers premium features such as protection against brute force attacks, real time back ups and recovery plans. Once you’re enabling this plugin you can say that you have successfully moved your site to self-hosted WordPress, but that thanks to the Jetpack plugin, you are still a member of the pack.
Good Luck!
I hope you liked this article. If you are considering a move from WordPress.com to a self-hosted WordPress solution feel free to contact me for assistance. I offer affordable WP migrations with installation and configuration of all plugins of your choice included.
Warm Regards, ~ Debby Winter
Notes: Self-Hosting with WordPress: What you need to know (1). Automatic is a distributed company made up of people working from wherever they choose (2). How to move from WordPress.com to a self-hosted site (3). Do you still like WordPress (4).

Reblogged this on The Searchlight.
LikeLike
Thanks for reblogging my post about WordPress migration 🙂
LikeLiked by 1 person
It’s my pleasure always, Debby. Welcome.
LikeLiked by 1 person
Really interesting post. I’ve been looking at information about self-hosting recently and this was very helpful.
LikeLiked by 1 person
Thank You!! Moving from WordPress.com to a Self-Hosted WordPress blog gives you a lot more flexibility compared to the WordPress business package which costs $25/month. If you plan on moving and you need a helping hand you know where to find me 😉
LikeLiked by 1 person
Great Information. I have another blog through Bluehost is that the same thing as a self-hosted WordPress blog?
LikeLiked by 1 person
Yes it is, if you have a blog at Bluehost or at any place other than WordPress.com than this is a self-hosted blog. It makes a world of a difference when it comes to plugins and tweaking of settings 😉
LikeLiked by 1 person
Thank you!
LikeLiked by 1 person
Anytime 😉
LikeLike
Thanks for that I will definitely let you know if I’m planning on moving to a self-hosted site!
LikeLiked by 1 person
Very informative post Debby. Thanks for such a great sharing. You’re truly very professional when it comes to offer services and at the same time, very kind & generous….with lots of patience. I’ll for sure be recommending you, whoever needs the services you’ve mentioned in this post….& I’m sure you are capable of doing a lot more.
LikeLiked by 2 people
Thank you dear Navin for being a valued customer. I am very grateful for the pleasure of serving you and hope I meet all your expectations. 😉
LikeLiked by 1 person
You’ve exceeded all my expectations, dear Debby. I’m very thankful the way you’ve helped me 😊
LikeLiked by 1 person
At your service! 😊
LikeLiked by 1 person
I’m blessed that it’s you who’s looking after my site. Your patience has also been quite extraordinary 😊🙏
LikeLike
Namaste 😊🙏
LikeLiked by 1 person